The Right Way to Hang Shelves on Plaster Walls
Shelves are the perfect addition to small spaces, combining functional storage with stylish wall decor. But if you live in an old home with lath and plaster walls, it can be tricky to hang them. Not all advice is good advice when it comes to hanging things on lath and plaster. Read on for the correct way to hang shelves on plaster walls.
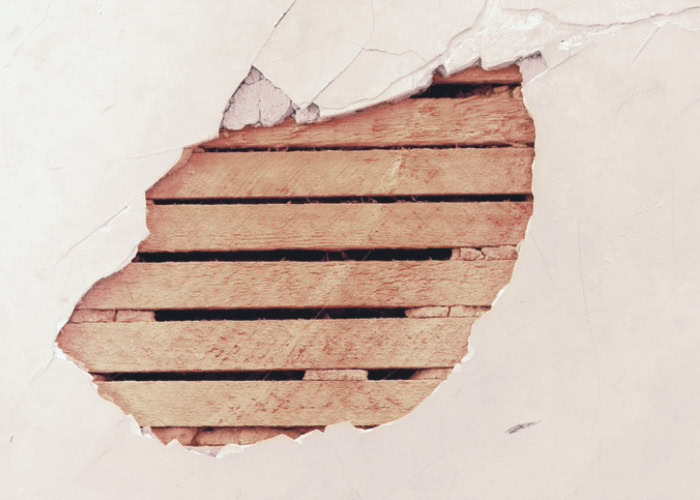
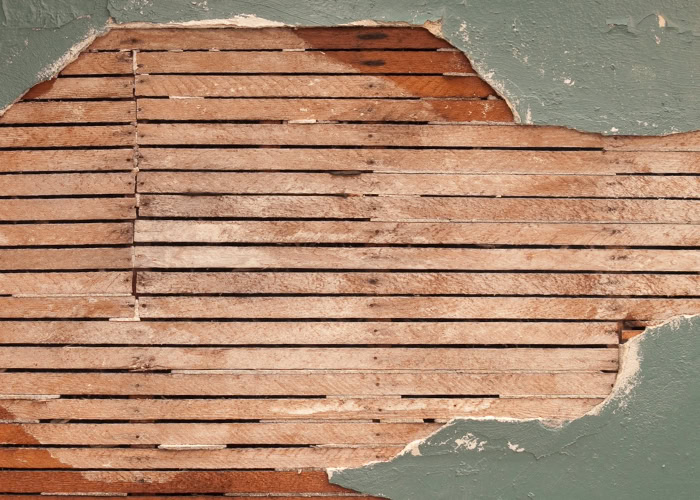
What is Lath and Plaster?
Most old houses with plaster walls used a technique called lath and plaster. Laths are strips of wood used as a base for plaster. They were attached to stud framing or furring strips in rows before plaster was skimmed over top in several coats.
Old lath and plaster walls can be brittle and prone to cracking. Because it is a decorative finish, plaster walls offer very little strength to support heavy objects. So how do you hang shelves on plaster walls so that they are strong and secure?
As an owner of an old home, I’ve been there! And I’ve learned the hard way that molly bolts and wall anchors in lath and plaster are not the way to go. Here’s how to hang shelves on plaster walls the right way so that they’re strong and secure.
- The Challenges with Hanging Things on Plaster Walls
- Determine the Type of Wall Construction
- Hanging Shelf Brackets When You Have Wall Studs
- Hanging Shelf Brackets When You Have Masonry Walls
- Attaching the Shelf to the Brackets
- When All Else Fails
The Challenges with Hanging Things on Plaster Walls
Because plaster is brittle, attaching something heavy to it, or even to the lath beneath it, isn’t a reliable option. There are all kinds of wall anchors and molly bolts currently being recommended to homeowners with lath and plaster walls.
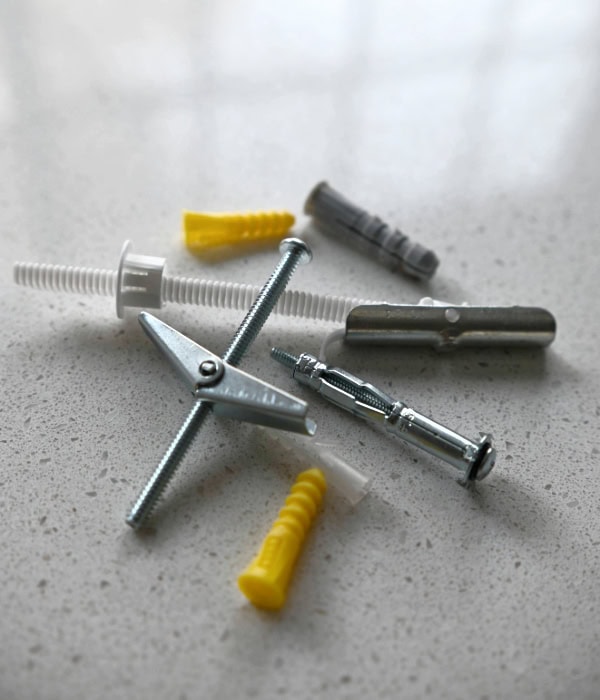
But even if you find a bolt that attaches to the lath, your anchor point is only as strong as your pieces of lath. These thin pieces of wood are often over 100 years old, very dry wood and prone to splitting. They are also only attached to a stud or furring with a couple fine nails. Putting too much weight on the anchors can pull the lath free from the stud, taking the plaster with it.
Molly bolts and wall anchors may be an option for hanging something light like a small picture frame. But if you’re planning to hang shelves on plaster walls or other heavy items, you will need to attach to something structural. Remember that plaster—even when used in combination with lath—is primarily a decorative element. It cannot be relied upon to support heavy objects.
Determine the Type of Wall Construction
In order to attach something to the underlying wall structure, we must first determine what is behind the plaster. In other words, how is the wall constructed?
Exterior vs. Interior Walls
The walls that separate rooms from one another are called interior walls. In North America, interior walls are most commonly constructed using wood framing, mostly 2x4s or 2x6s. The inside of these walls is usually hollow.
The walls that make up the perimeter of the house are called exterior walls. These are the walls that come in contact with the outside. They are often thicker than interior walls, with insulation to help control the temperature inside the house. For old houses that used lath and plaster, exterior walls were usually either wood framed or solid masonry.
Party Walls
If you live in a house like a duplex or a semi-detached, the wall that separates you from your neighbor is called a party wall and is often constructed differently than an exterior or interior wall. Walls separating neighbors in a townhouse or semi-detached house are made of concrete or masonry block that acts as a fire protection between the adjoining homes.
Wood Framed Walls with Studs
You might already know how your house was constructed based on how it looks from the outside. If your house has siding on the outside, with no bricks in sight, this usually indicates a wood-framed house. This also means the exterior walls will have studs you can attach to.
Whether it is an interior or exterior wall, if the wall is constructed with wood, it will have studs you can attach to. Lath and plaster walls were constructed by nailing strips of wood horizontally across stud framing and skimming it with plaster. In older homes, studs may be spaced slightly differently than today. Today studs are usually reliably placed 16” on center, so if you locate one stud, you can measure 16” over to find the next one. But back in the early 1900s, there was more variation in spacing. Sometimes studs were placed several inches wider or closer together depending on the carpenter.
Plaster Walls in Brick Houses
When brick is present on the outside of the house, it can mean one of two things: the house is made of solid structural brick, or it uses a brick veneer. Brick veneer is a product that was introduced around the 1950s. It essentially just a style of exterior cladding and would not affect anything you hang on your walls.
Structural brick was usually made up of two or three layers (or wythes) of horizontal, running bond laid brick that interlocked together to form sturdy structural walls. Sometimes solid brick can make hanging things on exterior walls more difficult.
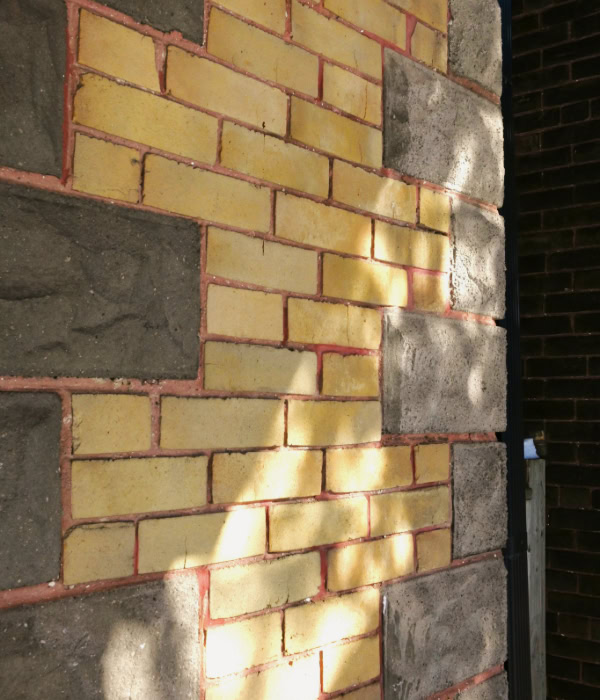
So how can you tell if your house is structural brick or a brick veneer? Look for the short bricks, or the bricks that have been turned inward. Brick masons of the early 1900s would turn a brick inward at least every 6th course to tie it in with the layer of brick behind it. You can usually tell if you’ve got structural brick when you can see the butt end of a brick periodically.
When plaster was used on solid brick walls, lath was fastened to wood pieces called furring strips that were set into the mortar. However, some brick walls had the plaster applied directly to the brick, without using lath.
Many homes with brick exterior walls have interior walls that are framed using studs.
Take a moment to make sure you know what type of wall you will be hanging your shelves on. For more info about hanging something on exterior walls, you can read a past post I wrote, Exterior Walls in Old Houses: Know Your Walls Before you Reno
Hanging Shelf Brackets When You Have Wall Studs
If your walls are wood framed with lath and plaster finishing, the correct way to hang shelves will be to first locate the wall studs. You will need multiple wall studs to properly hang a shelf, so you may need to be flexible with where you hang them. Each of your shelf brackets should to be securely fixed to a stud.
Locating a Stud
Usually, studs can be located in a wall with lath and plaster or drywall using a strong magnet. The magnet sticks to the metal nails that attach the lath to a stud, or screws that attach the drywall to a stud. To learn more about locating a wall stud using a magnet, you can read a my previous post, How to Find a Stud With a Magnet —for Drywall or Plaster Walls!
Mark Where Your Studs Are
Once you think you’ve detected a nail, pull the magnet directly up or down along the wall to try to locate more nails. If there are multiple sticking points in a vertical line, this will confirm the presence of a stud. Mark this line with a pencil.
Next, measure in 16 inch intervals, both left and right from that point and use your magnet again to try to locate more studs. Studs in old houses were not always perfectly spaced 16 inches on center but they were often close so this measurement can be used as a starting point to find other studs.
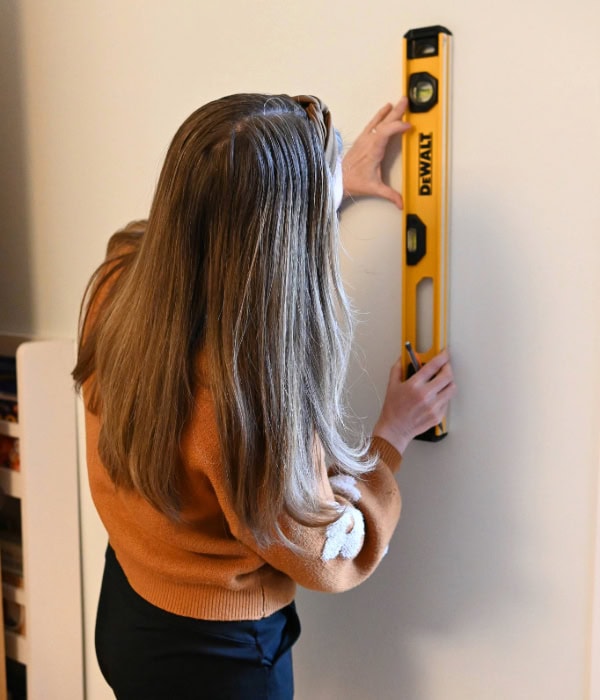
Use a level and hold it against the wall where you suspect the stud to be, adjusting until it is vertically level. Mark along it with a light pencil line. Repeat this for as many additional studs as you think you’ll need for the span of your shelving.
Fastening a Shelf Bracket to a Stud
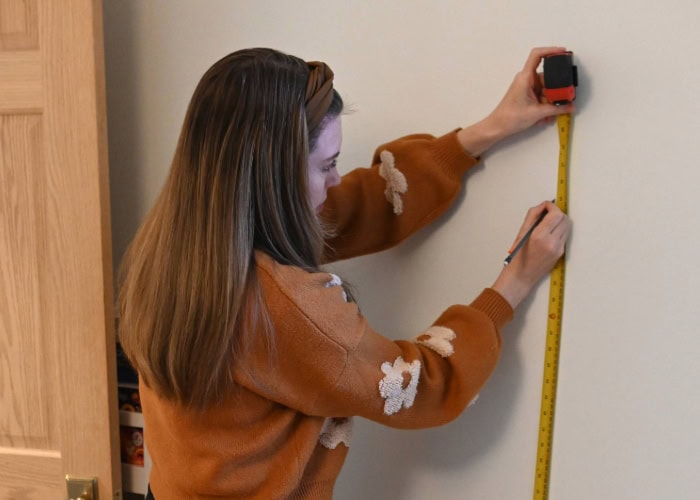
Once you’ve mapped the studs in your wall with a straight, vertical pencil line, measure upward from the floor to the height where you want to hang your shelf.
Use your level again and place it on the wall where you want your shelf to go. Making sure it is level, draw another light pencil line. Where that line intersects with your vertical stud pencil line, use your pencil to draw an X.
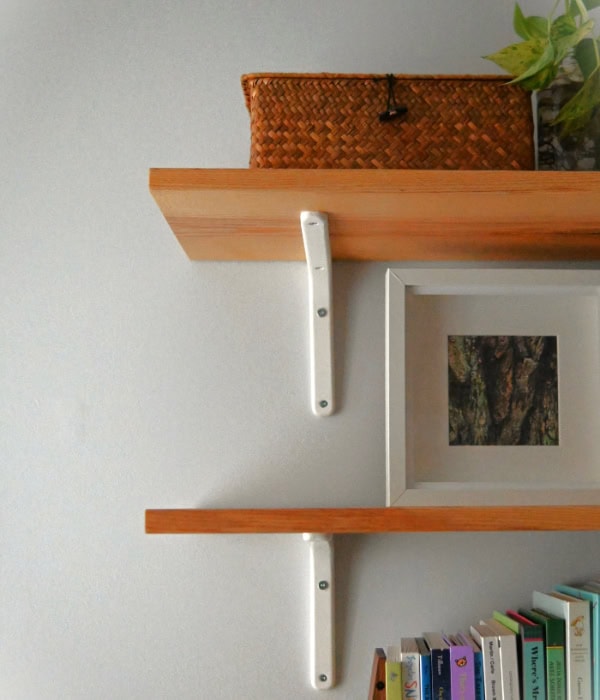
If you are using traditional brackets for your shelves that are mounted underneath, position the top edge of your bracket on the x where your two pencil lines intersected. Line up your bracket so that it is plumb and following your vertical pencil line. Mark where the bracket screw holes fall on your wall.
Hanging the Bracket
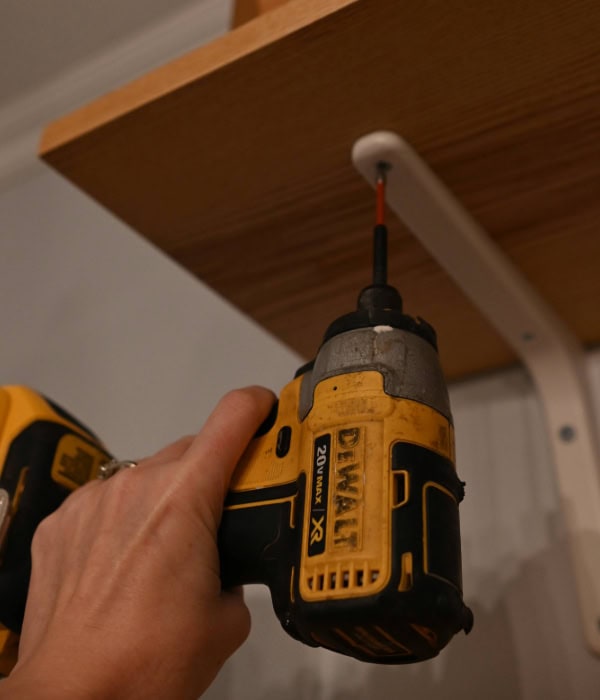
Now it’s time to secure the brackets to the wall. Because lath and plaster is so brittle you’ll need to drill a pilot hole for your screw.
The pilot hole will serve a few different purposes. First, it will make a starter hole in the plaster so that the screw is less likely to crack it. It will also make a starter hole in the lath so that the wood is less likely to split when a screw is driven through it.
Finally, the pilot hole will allow you to know for sure whether you’ve hit a stud or not. If there is no stud behind the drywall, the drill will slip easily the rest of the way into the empty gap of a wall, or a wall filled with soft insulation, but if it encounters more resistance past the first 1/2″, then then you have likely hit a stud.
Using a drill and a 1/8 inch drill bit, gently drill through the center of the markings for the bracket holes.
Expect a bit of light resistance for the first inch as you are pushing through drywall.
Once the pilot holes are drilled for each of your brackets, hold your brackets in place. Screw them in place using 3” construction screws.
Hanging Shelf Brackets When You Have Masonry Walls
Masonry walls like brick and concrete require specialized fasteners to hold the weight of the shelves. The most common method is to use masonry screws like Tapcons, but you can also use construction screws in combination with expansion bolts. Expansion bolts like lead anchors are placed into a pre-drilled hole, expanding once the screw is driven in, gripping tightly into the masonry.
*The links in this section may include affiliate links. Any purchases from those links help to support my site at no additional cost to you.
To install shelves on a masonry wall, start by marking the desired shelf height and drilling pilot holes using a drill with a masonry drill bit. Standard drills may work on old brick but may lack the power to drill through concrete. So if you are trying to fasten into concrete, it may require a hammer drill. Once the holes are drilled, insert the appropriate anchors. If you’re using expansion bolts like lead anchors, gently tap them into place with a hammer before securing the shelf brackets with screws.
For solid brick walls, masonry screws like Tapcons can often be driven directly into the pre-drilled holes without additional anchors. Test the strength of your screws by wiggling the shelf brackets to see if there is any movement. If the screws don’t feel solid, remove them and insert lead anchors before screwing the brackets back in.
For added security, you may choose to add construction adhesive to the pre-drilled hole in addition to anchors. However, this makes future removal more difficult.
Attaching the Shelf to the Brackets
Once the brackets are hung, place the shelves on top and center them so they look good. Mark where the bracket holes are on the shelves. Then, remove the shelves and pre-drill shallow pilot holes in the shelves using a 1/16” drill bit. Be sure not drill through the other side of the shelf!
Put the shelves back on the brackets and screw them in place. Make sure the screws are short enough that they don’t screw though the top face of the shelves. Usually screws 3/4 inch screws work well.
When All Else Fails
If you’re are not having luck with the above methods, don’t stress; hanging things on plaster walls can be tricky. Throwing in the towel is better than hanging up shelves that are poorly fastened. The last thing you want is for your shelf to come crashing down.
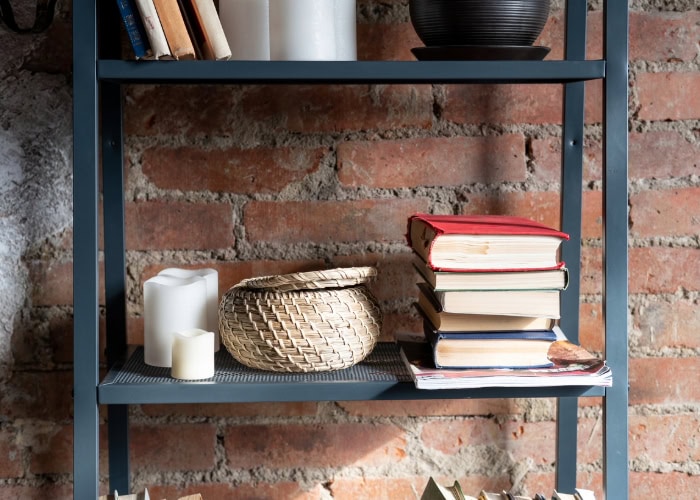
Instead, consider using a freestanding shelving unit or bookcase instead. These eliminate the need for the wall to support the entire weight of the shelves. However, it is always a good idea to fasten bookcases and freestanding shelves to the wall to prevent them from tipping. This is especially important if you have small kids. Furniture straps can be used to connect freestanding shelving units to the wall to prevent tipping.
Final Thoughts
Having plaster walls doesn’t mean you can’t hang shelves. The trick is in knowing how to hang shelves on plaster walls the correct way. Using wall anchors, toggle bolts or molly bolts may work to hang a light picture frame, but no amount of anchors fastened to lath or plaster is safe for hanging shelving.
The best thing to do is to assume the lath and plaster has zero strength. Choose the location for your shelves only after identifying where the studs are located so you can know where you can attach your shelving brackets.
For solid brick, Tapcon masonry screws can be used on their own, driven into the predrilled hole. For stubborn brick and concrete, you may need to predrill using a hammer drill and insert expansion anchors like lead bolts before your screws go in.
Improperly secured shelves can fall, damaging your wall, belongings and potentially causing injuries. So exercise caution when hanging shelves on plaster walls. If you need to call it quits, choosing a freestanding shelving unit is always a good alternative.


