
How to Refinish Old Hardwood Flooring
The crowning jewel of our old homes might just be under our feet. Narrow planks of old-growth hardwood with meticulously fitted tongue and groove joinery. It’s the old hardwood flooring of a hundred years ago.
These antique wood floors were common in houses in Canada and The United States built before the 1930s. Many old houses today still have this vintage narrow plank flooring in oak or hickory. Sometimes it’s still in excellent condition, sometimes it needs a lot of work.
Read on to learn why you should save your old hardwood flooring and how to refinish it.
Why Save Old Hardwood Flooring?
You might feel tempted to pull out your old hardwood flooring and replace it with something more modern. Here are three reasons why you might want to reconsider:
Durability
Nothing can beat the durability of hardwood coming from old, well-established trees. Old-growth trees grew slowly amongst other trees, producing tighter wood grain than the mass produced trees of today. This created extremely hard wood products that were durable and resistant to damage.
Cost
Today, prefinished hardwood flooring costs somewhere between $5 and $10 per square foot. A homeowner could easily pay upward of $10,000 for new hardwood floors to be installed in their home. So to refinish something that already exists makes good financial sense. The cost of floor finishing products and renting the drum sander and edger is minimal—about $300. Even hiring a professional to do the work for you would end up saving you thousands compared to replacing it.
Value
In addition to being cost-effective to refinish, the old hardwood flooring in your home is valuable. The wood itself is likely 200 years old or older, selected at the time for its beauty. Back then, high-quality hardwood flooring was quite the status symbol.
But if you’re thinking, ‘I should pull out my narrow strip flooring and sell it,’ here is the kicker: old hardwood flooring completely loses its value once it is removed.
The reason is the tongue and groove. Like most flooring today, one side has a ‘tongue’, or ridge that fits a groove in the piece beside it. This allows the boards to fit into each other, creating a stable and uniform surface. It is extremely difficult to pull up old flooring without damaging the tongue, which tends to crack off. Old hardwood is also often very dry so it tends to snap and split when removed. This is the reason why authentic reclaimed hardwood flooring is so difficult to find.
How to Refinish Old Hardwood Flooring
If you have vintage flooring in your home that needs restoring, it probably has more than one issue. Finishes wear off overtime, leaving your flooring unfinished or dull-looking. There may be dents and scrapes or entire floor boards missing.
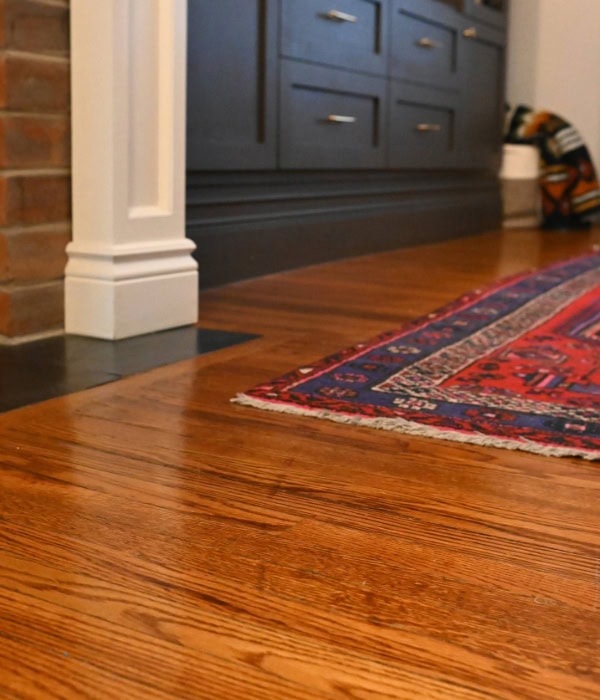
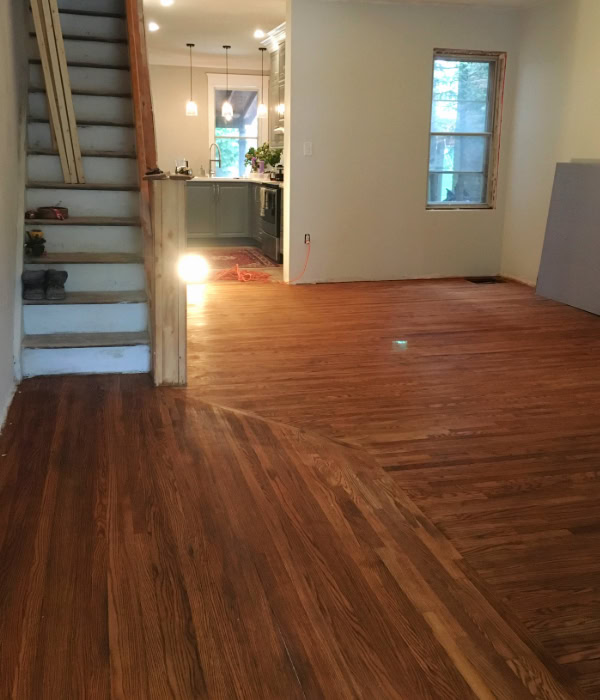
When we moved into our house in Toronto, the 1910 oak flooring had certainly seen better days. The finish had worn off, and it had large gaps where pieces of flooring were missing.
Before
After
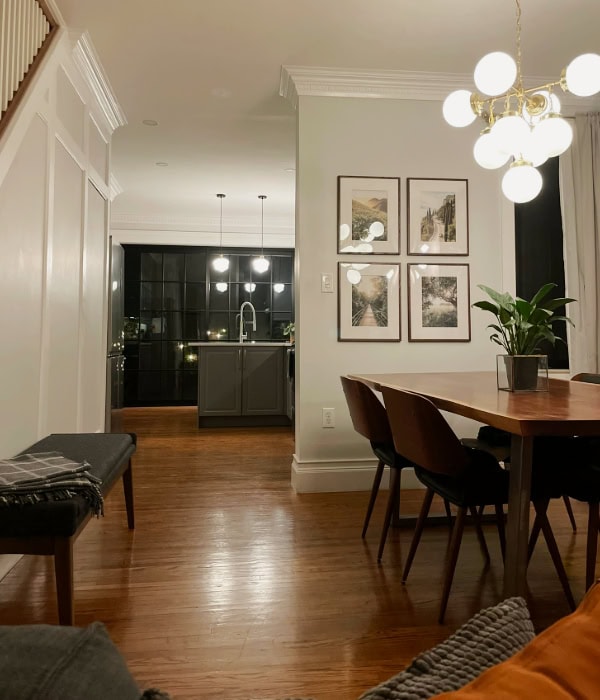
Even after refinishing, they don’t look perfect, but I love these old floors. If you have a house with vintage hardwood flooring, I think you have to be prepared to showcase its character—dents, divots and all.
I learned a lot in the refinishing of our old hardwood floors, because it was not all smooth sailing. Here is a breakdown of everything I learned when it comes to refinishing old hardwood flooring:
- If you can afford it, pay a professional
- Patch with the right pieces
- Don’t rush sanding the edges
- Be careful when sanding thin or damaged flooring
- It is possible to not sand enough
- Stir the can thoroughly
- Wait for the right conditions for polyurethane
If You Can Afford It, Pay a Professional
I don’t usually say this. I am always in favor of a DIY challenge, but our flooring is the one thing I wish we had hired a professional for.
There were a lot of things I was unaware of that more research would have prepared me for. Sanding can be a bit of an art form, especially the orbital edge sander which can leave circular scuff marks if not done carefully. Patching gaps can be tricky, and temperature and humidity can affect the curing of polyurethane.
Professionals have the proper sanding equipment and heavy-duty vacuums to ensure your floors are finished to a high-quality. So if you are able to shell out for professional refinishing, do it. It should still work out to a fraction of the cost of installing new flooring.
If you are planning to refinish your floors yourself to save money, be sure to do your research ahead of time. Read on for more tips.
Patch With the Right Pieces
Patching missing or damaged hardwood is the first step if you are refinishing your own hardwood flooring. Sanding should be done only after all patchwork is complete so everything blends together once sanded.
Multiple places in our floors needed to be patched. In the downstairs, walls had once existed sectioning off the living room (or front parlor as it would have been called) from the dining space. When a previous owner removed these walls, it left long gaps in the hardwood.

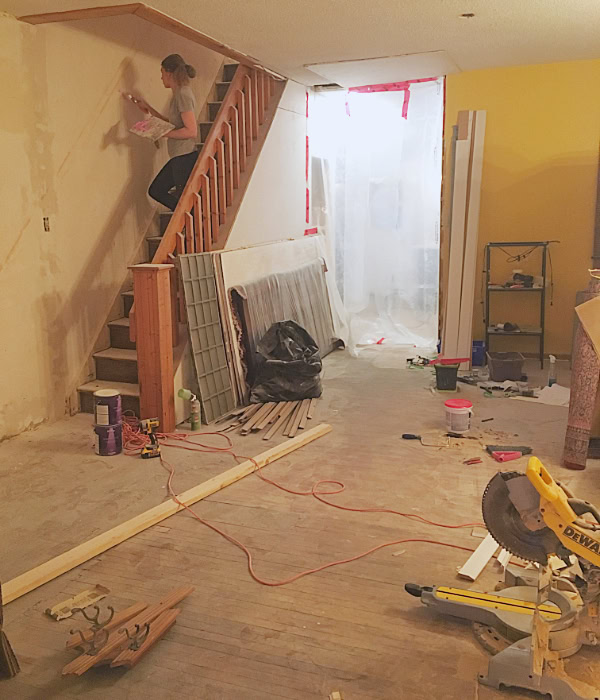
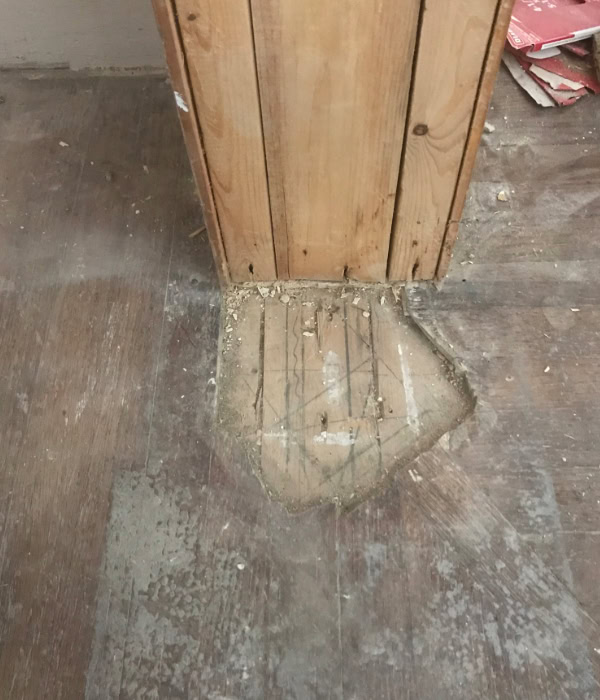
Near the newel post of the staircase, there was another large gap in the flooring, likely from an old newel that curved out from the staircase.
Where to get pieces of reclaimed wood flooring
One of the difficulties to finding antique reclaimed wood flooring is that it often gets damaged during removal. But you can often find pieces that can be salvaged enough for patching purposes. Check local buy and sell sites for people giving away or selling reclaimed flooring. Keep an eye out for others renovating in your neighborhood. If they are doing demolition, ask what they are removing. Homes of the same vintage often used similar building materials.
If you’re having trouble finding salvaged pieces that match in well with your existing flooring, consider stealing a few pieces from another place in your home where they’ll go unnoticed, like from a closet or under built-in furniture.
How to patch
The first step to patching old hardwood flooring is removing unwanted material, and making clean edges for the new flooring to sit against. You can use a track saw with the blade set to a very low depth, or a router to cut your finishing line. If you’re using a router, the most common thing to go wrong is for the router to skip, cutting away material you didn’t intend to. To avoid this, set up a secure straight edge and nail it down with finishing nails or double-sided tape so you can run the router against it without it slipping. Use a speed square to ensure you are cutting at a perfect right angle.
*Some of the reference links provided in this article may be affiliate links, meaning that any purchase from that link would help to support my site, at no additional cost to you.
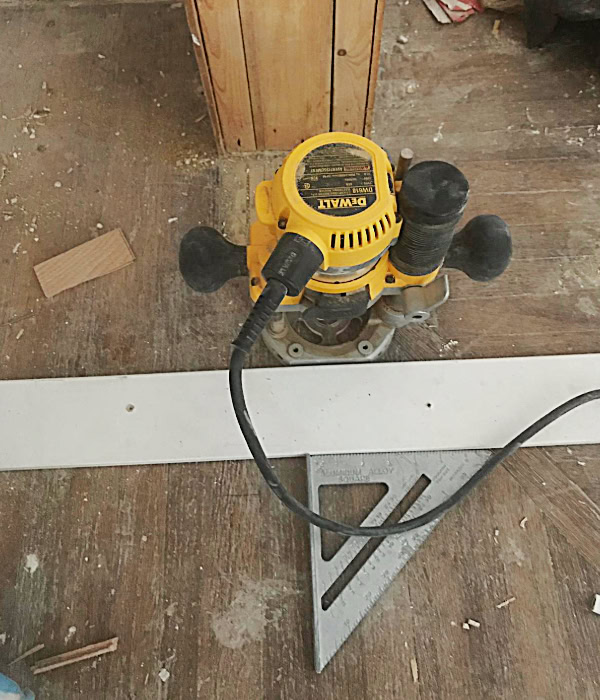
Use a router, a speed square and a straight edge to cut a finishing line in the old hardwood flooring for the new pieces of flooring to sit against.
For one-off pieces that need to be cut, you can use a router, multi-tool or a very sharp chisel. You can also use a chisel to square the corners of router cuts. Use a utility knife to remove the tongues off patch pieces if needed. Secure pieces in place by applying wood glue underneath and face-nailing with finishing nails.

Tips for Success:
If you need to do patch work on your own floors, don’t rush it. Put time into sourcing or salvaging the best pieces that you can, with matching thickness and grain. It’s worth taking the time to get it right the first time.
Don’t Rush Sanding the Edges
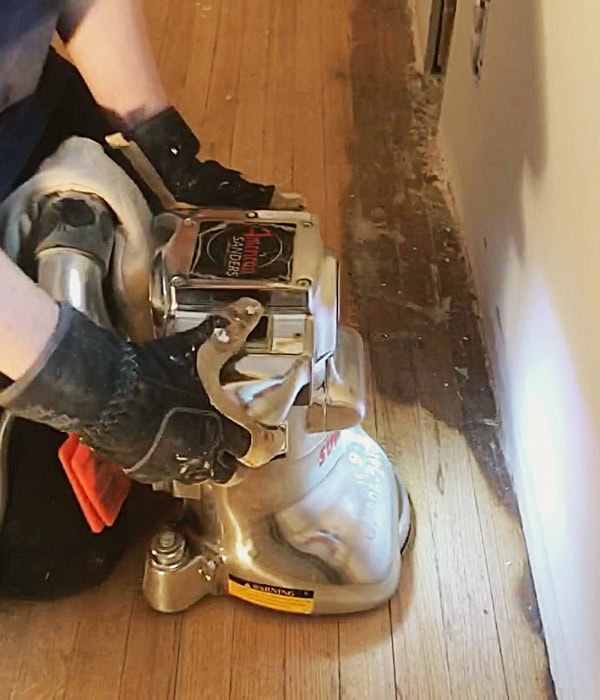
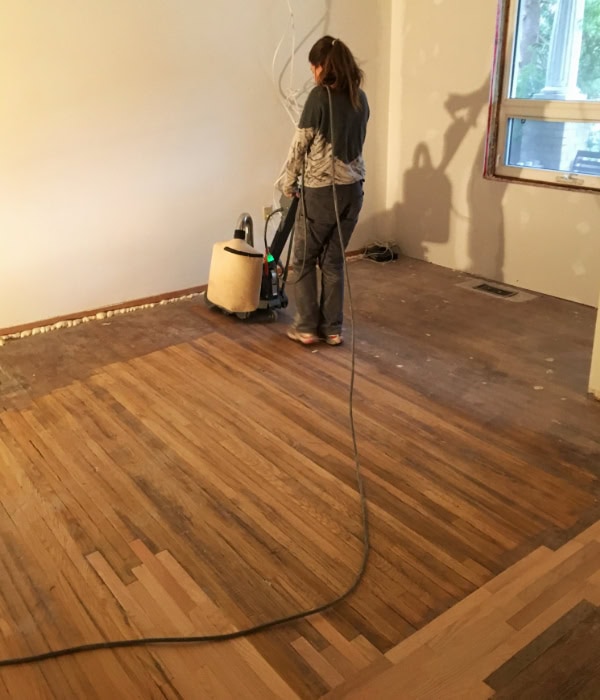
For each of our sanding projects, we rented a large drum sander and an orbital sander for the edges. We used the stand-up drum sander for the bulk of the floor, sanding with the grain, or in the direction the flooring was running. After that, we used an ‘edger’ orbital sander that could get all along the edges of the room where where the drum sander couldn’t get to.

Unfortunately in both the upstairs and downstairs when we used the edge sander, it left sections of the floor where you could see the round orbital marks from the sander, giving it a wavy appearance.
These orbital marks aren’t always apparent to the touch or easily visible until the finish goes on. And once the polyurethane is applied, they are very hard to fix.
Tips for Success:
Move the sander slowly and evenly, being sure not to stay in one place for an extended period of time. You can also cause waves by tilting the sander or applying too much pressure. It is best to keep the edger flat on the floor, allowing the machine to do the work.
This wave effect can also happen when you don’t use enough variation in the sandpaper. Starting with a course sandpaper (like an 80 grit) and working your way up to a finer grit (220 or higher), it is best to use a selection of medium grit sandpaper in between to transition into a smoother finish. A good rule of thumb is trying not to skip more than one grit value; grit count usually moves up in increments of 20, so this means trying to keep within 40 grit of the last sandpaper used.
Sand by hand at the end, going over the edged sections with a 220 grit paper to get rid of any of the remaining texture from the sander. Be sure to work with the grain of the wood, not against it.
The floor after patching, sanding and the first coat of stain, before the polyurethane went on.
I would also recommend wiping sections with a bit of water to help check for swirling or sander marks. Because these flaws are primarily visible after the stain and polyurethane go on, you can simulate this with a bit of water to see how it would look with a finish coat. Look at the floor from different angles in good lighting to see if touch ups are needed.
Be Careful When Sanding Thin or Damaged Flooring
Old hardwood flooring is extremely durable when installed. But because of its age, the wood is often very dry, making it difficult to remove without splitting the tongue and groove.
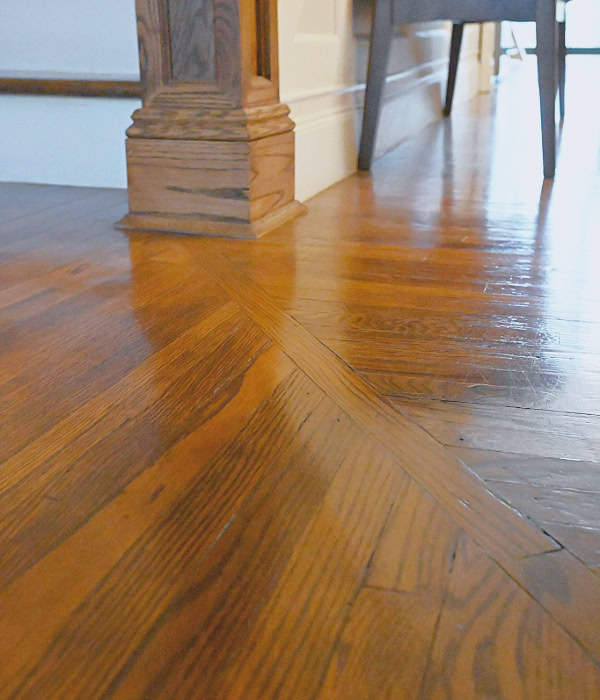
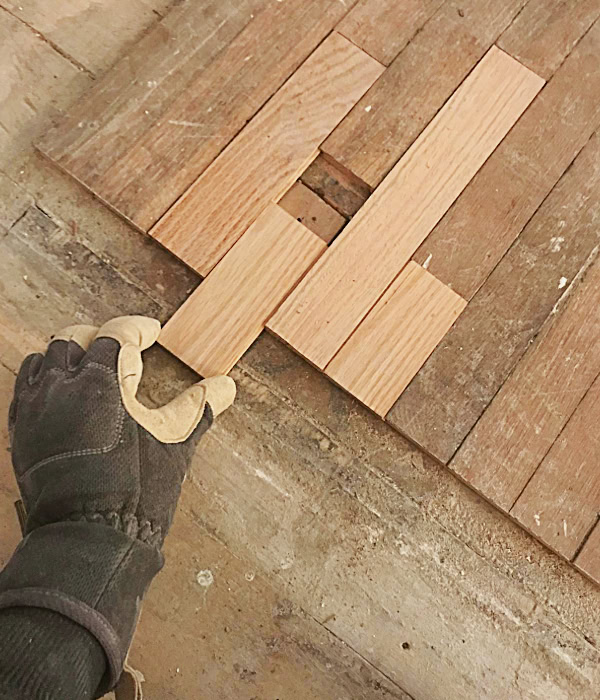
The tongue and groove was damaged on many of the salvaged pieces I was patching with. On many, the top of the groove was so thin it was barely able to cover the tongue of an interlocking piece.
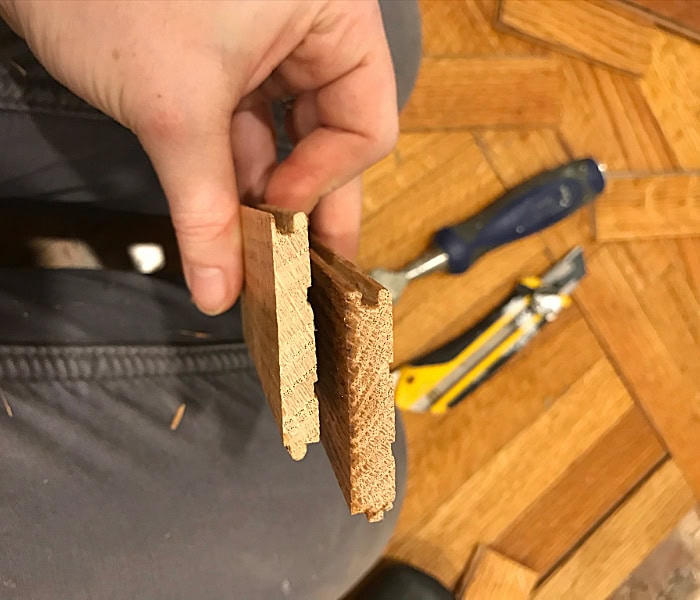
The top edge of the groove on the piece on the left is almost completely worn away, compared to the piece on the right.
When the sander went over these pieces, the top of the groove that was too thin got eaten up by the sander, leaving a gap that exposed the tongue of the piece beside it. I ended up having to source new salvaged flooring to redo my patchwork.
Tips for Success:
Before you sand, make sure the top of the groove isn’t cracked or too thin. You can fill in cracks with wood glue or epoxy if you notice them. Allow glues to dry completely before sanding so that glue residue can be sanded away. Products left on the surface of the wood can affect the ability of the stain to soak in.
Be careful of over-sanding, especially if your floors have already been sanded down. Check the edge of a few pieces if you can to see how thick the top edge of the groove is. If it is less than 1/16″, it should be sanded more carefully, or you may want to consult a professional before you proceed.
It is Possible to Not Sand Enough
Just as you can sand too much, you can also not sand enough. You want to make sure you sand away all previous finishes so that the stain you apply can soak in.
This became an issue when I tried sanding a section of finished flooring to remove marks from the orbital sander.
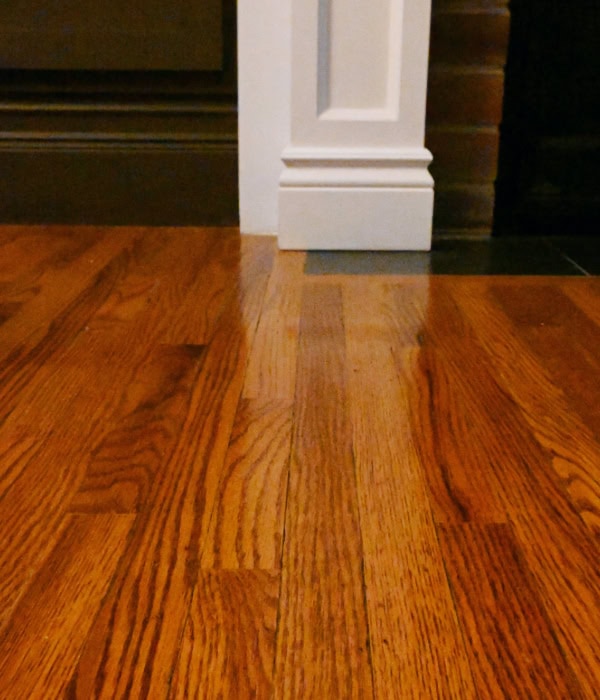
While it looked fine at first, the color of the stain lightened quite a bit after I applied the polyurethane. This was because I didn’t sand far enough past the initial finish to allow the new stain to sink in. Any stain that was sitting on the surface was lifted when the polyurethane went on, changing the color.
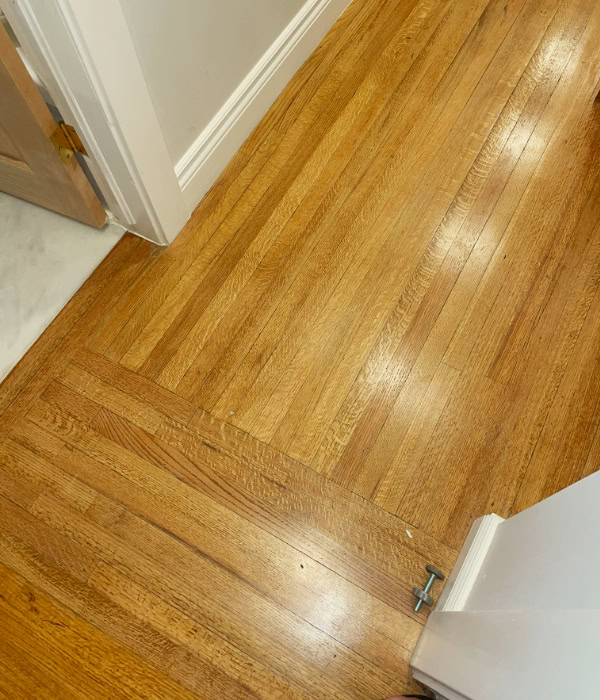
Not enough sanding before staining caused discoloration after the polyurethane application. Note the difference to the flooring in the bottom left corner, which had been well sanded.
Tips for Success:
Look for signs of the previous stain to determine whether the floor could use more sanding. if the previous stain is visible, it usually shows up around the edges of the floor boards.
Staining a small test section and allowing it to dry before adding a coat of polyurethane can also be a good idea to ensure that the finish dries to the color you have chosen. It is best to test out this section in a place that won’t be as visible, just in case it doesn’t blend seamlessly when you apply the rest of the finish. If you need to do more sanding, you can just sand away the test section.
Stir the Can Thoroughly
Before you apply polyurethane, mix it well to avoid inconsistencies in the finish. Polyurethane and other floor finishes should be stirred, not shaken, to prevent bubbles from creating pock marks. The product I recommend is a non-yellowing water-based polyurethane in a satin finish. Use a foam roller to apply it.
Polyurethane has something called ‘dulling agents’ added in to achieve the sheen you are looking for. These dulling agents sink to the bottom of the can over time, so it is important to scrape the bottom of the can with the stir stick to ensure a good mix. Additionally, the more you work from the same can—for instance, if you do one coat and use the same can to do the second coat without mixing the can well each time—the more concentrated the dulling agents can become. This can create a duller finish on the second coat, or an overall patchy look.
Tips for Success:
Always stir the can thoroughly before you apply polyurethane, being sure to scrape the entire bottom of the can using a stir stick to mix all ingredients thoroughly to achieve the proper finish. If you know you will not use a full can for each coat of polyurethane, you may want to consider buying several smaller cans instead of the larger one so you can open a new can for each coat (stirring it well each time).
Wait for the Right Conditions for Polyurethane
Applying polyurethane is one of the more difficult stages of refinishing a floor. Polyurethane can be finicky. While I am generally happy with the way our flooring turned out, we did encounter a problem after applying the poly. In the kitchen, the finished coat of polyurethane began chipping off after it dried. We quickly realized that if we scraped it lightly, the finishing coat would pull up and chip away, leaving the unfinished stain underneath.
This issue can also crop up if the stain underneath hasn’t dried properly. It can also happen if the surrounding environment is too dry or too humid. Because we were refinishing the floors in the peak of summer, our house was probably pretty humid.

Tips for Success:
If you are using stain prior to polyurethane, be sure that the stain has cured fully before applying the poly. While it is always better to use a water-based polyurethane with a water-based stain, and an oil-based polyurethane with an oil-based stain, it is possible to apply water-based poly over an oil-based stain if the stain has had several days to cure and is no longer tacky to the touch.
It is also beneficial to consider the temperature and humidity of the space you are working in. Polyurethane products do best when they are applied between 12‐35°C (15-95°F) and 40-80% relative humidity.
Conclusion
If you have old hardwood flooring in your home, you are lucky. No modern flooring will be able to compete in terms of quality and durability. There is value in saving original flooring, although it can be hard work to restore them yourself. Take time to research the proper steps to floor refinishing, and the issues that others have experienced along the way. It is hard to fix flooring mistakes once the finish goes on, so be prepared and try to do things right the first time.
The floors in our house are not perfect, but I am proud that we did them ourselves. Maybe one day, when the kids are grown and the floors are scuffed and worn, we might hire a professional to refinish them again.
Or maybe we’ll see those imperfections as a part of how this house became a family home, and we’ll leave them just as they are.


