
Insulating a Bedroom for Comfort and Energy Savings
Cold bedrooms, drafts and high energy bills are all side effects of not having enough insulation in your home. The good news is that you can fix it! In this post, I’ll tell you how I went about insulating a bedroom in my home from the inside, and what a difference it made!
Old Houses Lack Insulation
Old houses are notoriously drafty in the wintertime, primarily due to inadequate insulation. If your home hasn’t been renovated in the last several decades, you might be feeling the effects come wintertime. And your heating bills will reflect this.
In North America, it only became popular for builders to insulate houses in the later half of the 20th century. It’s common for houses built in the early 1900s to have very little exterior wall insulation, if any at all! And if you have insulation original to that time frame, it’s usually not that effective.

Today, newly constructed houses in cold climate zones are required to have insulation with an R-rating of R40. Getting to that level of insulation usually involves filling a stud wall cavity that is at least 6″ in depth, and adding a rigid insulation board to at least one side of the wall. But most of us aren’t building new homes, we’re working with the ones we have. So how can we retrofit our spaces so that they are more comfortable and energy efficient?
Determine Your Wall Type
The first thing to do is to determine how your walls are constructed. For more information about exterior walls in old homes, be sure to check out my post on Exterior Walls.
It is extremely important to know how your exterior walls are constructed if you are planning to insulate them. How your wall is constructed will dictate what methods and materials you are able to use to insulate.
There is no hard and fast rule to determine the current insulation levels based on the age of a house. The only real way is to open up a wall and find out. But if you have an old home (built in 1950 or before) that has never been renovated, it is probably worth investigating.
Insulating a Bedroom Without Trapping Moisture
Before you begin adding layers to an old exterior wall, you must first consider how your wall currently functions.
Old walls were porous. There were no plastic or impermeable coatings keeping the walls from drying out. If moisture found its way inside the wall, it could dry out from the inside or the outside.
Adding layers of insulation and vapor barriers to old walls can disrupt this balance. New impermeable materials can actually encourage condensation if not placed correctly. They can also make it harder for moisture that does enter wall to dry out, which can create mold issues.
This is the key to mold prevention: don’t trap moisture in your walls.
If you’re thinking about insulating a bedroom in your old home, read on to ensure you are insulating for comfort and energy savings, without encouraging mold growth.
Choose the Right Insulation Strategy
The type of exterior walls you have will dictate your insulation strategy. Your wall construction will determine where insulation can be added (whether you walls are framed or solid masonry) . If you haven’t done so already, read ‘Exterior Walls in Old Houses: Know Your Walls Before you Reno’.
Be sure to research the best strategies for insulating your specific wall type. Buildingscience.com is a great resource for solutions to retrofitting existing walls in old houses.
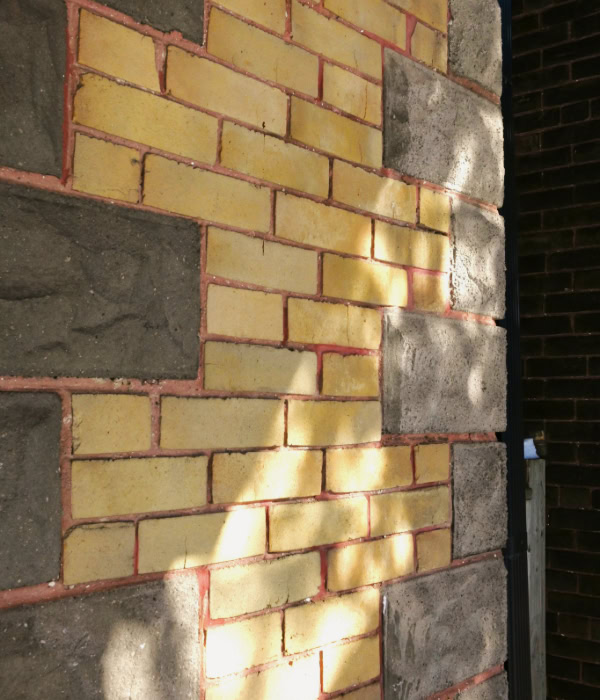
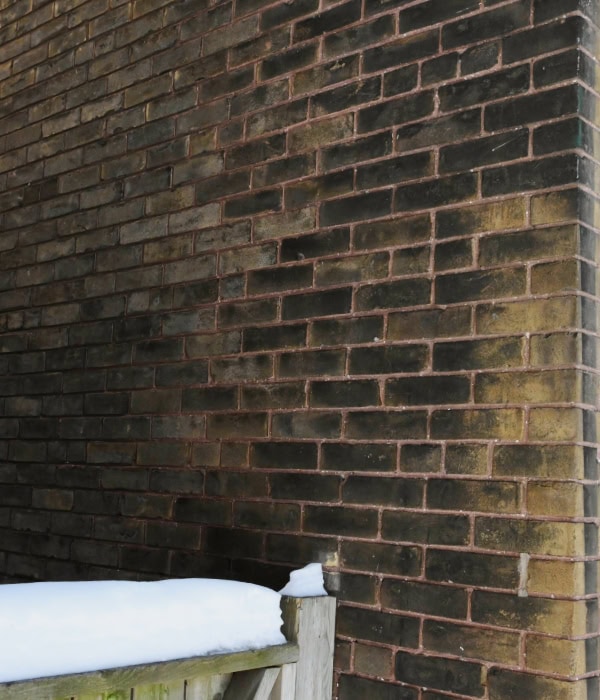
Insulating Brick or Block Masonry
The exterior walls of my house are brick masonry. The only exceptions are the roof dormers, which are timber framed. The walls of the house were never insulated because they are solid brick and there’s no place to contain insulation.
This presents a challenge because adding insulating means adding it as an additional layer to either the inside or the outside of the house. But most owners of historic brick homes would not be in favor of adding insulation board and new cladding to the outside of their homes. Adding it to the inside is a much lower impact and cost-effective solution.
Because masonry is porous, you can assume that moisture will be getting into your walls from the outside. Whatever solution you decide upon should be vapor permeable so any moisture can dry out from the inside.
Insulation
I decided upon Roxul mineral wool insulation. I like Roxul as an insulating material because it is low cost and made of natural materials (stone) with no VOCs. It is also fireproof and mold resistant and has a higher thermal resistance (R-Value) than fiberglass.
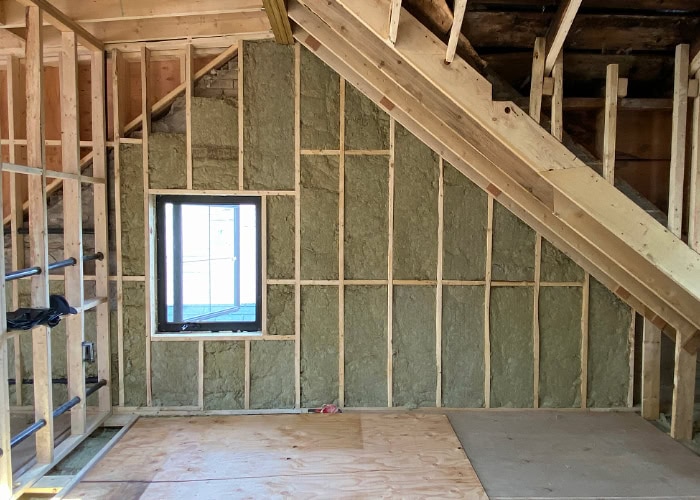
The usual way to install rockwool is within 2×4 framing. However, because we did not want to sacrifice too much space in the already small bedroom, I installed 2×2 wood strips and secured them to the wall 16″ apart. While building 2×4 framing to fit a full batt of insulation would be much more effective for insulating a bedroom, I knew the thin layer would do a lot to decrease heat loss, while optimizing space in the small room.

These 2x2s created a cavity for insulation batts, as well as a solid framework to fasten an air barrier and drywall onto. I split the batts of insulation, so that they were 2″ instead of 4″ in depth and fit them between the studs.

I mainly did this because we had 4″ batts leftover from our kitchen reno, but you can also buy 2″ Roxul board. If you are going the space-saving route, I would definitley recommend Roxul board. It is just a more rigid version of the batts, with a slightly higher R-Value, at about R-8.5 for 2″.
Air Barrier
An air barrier is a good idea as it adds a level of comfort to the home, preventing air flow though the walls, reducing drafts. An air barrier is essentially a paper or plastic membrane that gets stapled to the studs on the warm side of the insulation, creating a continuous layer.
When retrofitting older homes, it is best to choose an air barrier that is vapor permeable. A vapor molecule is smaller than an oxygen molecule, so certain materials can control air flow while still allowing moisture through. By choosing an air barrier instead of a vapor barrier, you can limit drafts while still ensuring any trapped vapor has the chance to dry out.
Products like CertainTeed’s MemBrain are ideal as they provide a continuous air barrier, while also acting as a vapor retarder. This means that it helps to control moisture from entering the wall, but is also permeable enough to allow allow moisture to escape, keeping the wall dry.
If you don’t have access to air barrier products, using an air tight drywall and sealing air gaps is preferable to adding a polyethylene vapor barrier which can trap moisture.
Air Sealing
After you install the drywall, fill gaps around windows, doors, and electrical boxes with an expanding foam. Filling gaps and cracks prevents warm air from leaking behind the insulation. When using spray foam, shake the can well before application and hold it upside down as you spray to prevent the straw from getting clogged.
While spray foams are not usually vapor permeable, they do have excellent air sealing properties. So even if you are avoiding a vapor barrier to prevent moisture accumulation within the wall, a good air sealant will help with that goal, as it prevents warm air from entering the wall, which can carry moisture with it.

Once you install your trim work, use a paintable caulk to seal the gaps in the trim. This prevents air from getting past the trim and into your walls.
Insulating Timber/ Wood Framed Walls
Wood framed houses provide more options for adding insulation. If your walls were framed with wood, it means they have a wall cavity. This provides an opportunity to add insulation between the studs. If you have a small amount of insulation already in the walls, you could either top it up with more (if it is in good condition) or take it out and replace it.
With wood framed construction, it is common to add a vapor barrier on the warm side of your insulation. If you are concerned about moisture accumulation, using an air barrier instead of polyethylene vapor barrier is a good idea. Use a stapler to attach your air barrier to the studs before you add your drywall.
Rigid Foam Board
In place of an air barrier, you can also add a rigid insulation board for added insulation. Attached it to the studs to form a continuous layer of insulation on the inside. You can then add your drywall using a longer screw which still reaches the studs. Tape the seams to prevent air leakage.
We used this method for the dormers in the attic bedroom of our house. Because the original insulation was nothing more than sawdust, we removed it and filled the stud wall cavity with batts of rock wool insulation. To reach R-40, we also added rigid insulation board to create a continuous layer of insulation before adding drywall.
Wood Framed/ Brick Combo
Like my house, is it possible for a home to utilize more than one type of wall construction. If the outside of your home is brick, it could be a brick veneer, opposed to solid brick. A brick veneer is a single layer of brick used as a type of cladding. It is common for the internal structure of these walls to be wood framed or made of masonry block. This means that even if you have a house with brick on the outside, it doesn’t always determine what is on the inside of that wall.
Look for clues to determine whether your walls are solid brick or a veneer before you begin. Masonry brick walls were constructed using 2 or 3 layers (or wythes) of brick in order to make them structural. In order to tie these brick layers together, it was common for the mason to turn a brick inward every few courses of brick. So if your wall has a brick turned inward, that is a good indicator that your walls are solid, not a veneer on top of framing.
When in doubt, it is a good idea to open up a small section of your wall from the inside. This will allow you know for sure how your walls are constructed before you commit to a method of insulation.
The Results
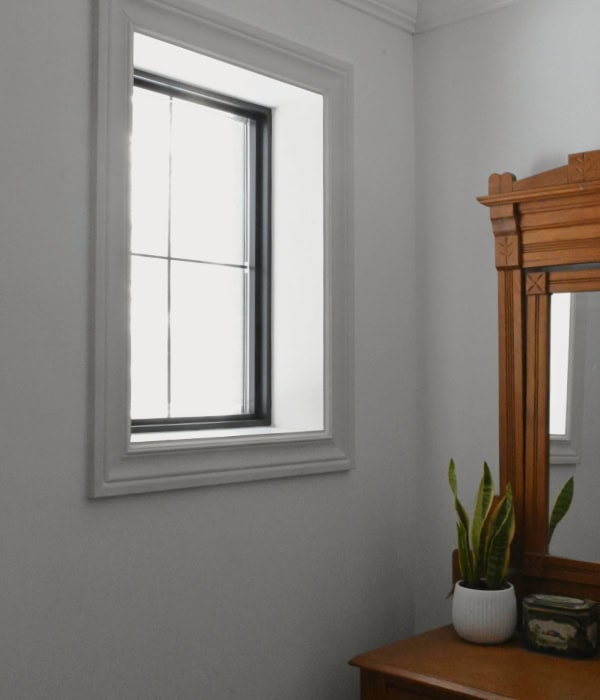
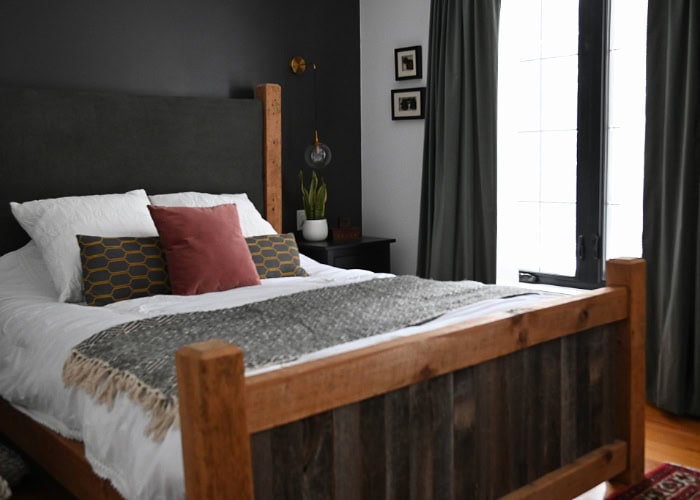
The walls in our bedroom were uninsulated solid brick, which provided very little protection from the cold. Toronto winters can be frigid, and that January when we moved in was no exception. We spent our first winter in the house with an icy cold bedroom. The furnace simply could not keep up with the demand when we were losing so much heat through the walls.

Adding the 2×2 framing and just 2″ of Roxul with an air barrier and air sealing made a drastic difference. Our second winter in the room was noticeably warmer and it has held up to this day. The furnace no longer struggles to heat the space. The air barrier and air sealing eliminated drafts, reducing air leakage though the wall.

By insulating a bedroom from the inside, we were able to significantly increase the comfort and efficiency of the space. Best of all, we were able to complete the project for only a few hundred dollars in material costs.
Final Thoughts
If you are thinking about insulating a bedroom, the first step is to consider what your walls are made of. Make sure you are not adding impermeable materials where they can trap moisture and create a condensation sandwich.
If you are unsure what’s in your exterior walls, open up a test section so you know for sure. Do your research to determine the best insulation strategies for your specific wall type.
Insulating a bedroom is a great way to improve comfort and energy efficiency in your old home. And it does not need to be costly—a few hundred dollars in material costs is all you need. With some research and a bit of hard work, insulating a bedroom is a project that you can do yourself!
Your warm bedroom oasis awaits.


